
Order Confirmation Emails Guide
Transform transactional order receipts into engaging customer touchpoints by delivering branded order confirmations with item summaries, dynamic product recommendations, and timed post-purchase updates.
How Order Confirmation Sequences Work
When a customer completes a purchase in your Shopify store, Cartwheel catches the orders/paid webhook event and automatically enrolls the order into your active Order Confirmation sequence.
Creating an Order Confirmation Sequence
To create and configure a new order confirmation sequence:
In your Shopify Admin, navigate to Apps → Cartwheel → Retention Emails.
Click the Order confirmation tab in the sub-navigation (or click All sequences → Create sequence → Order confirmation).
Click the primary Create sequence button in the top right header.
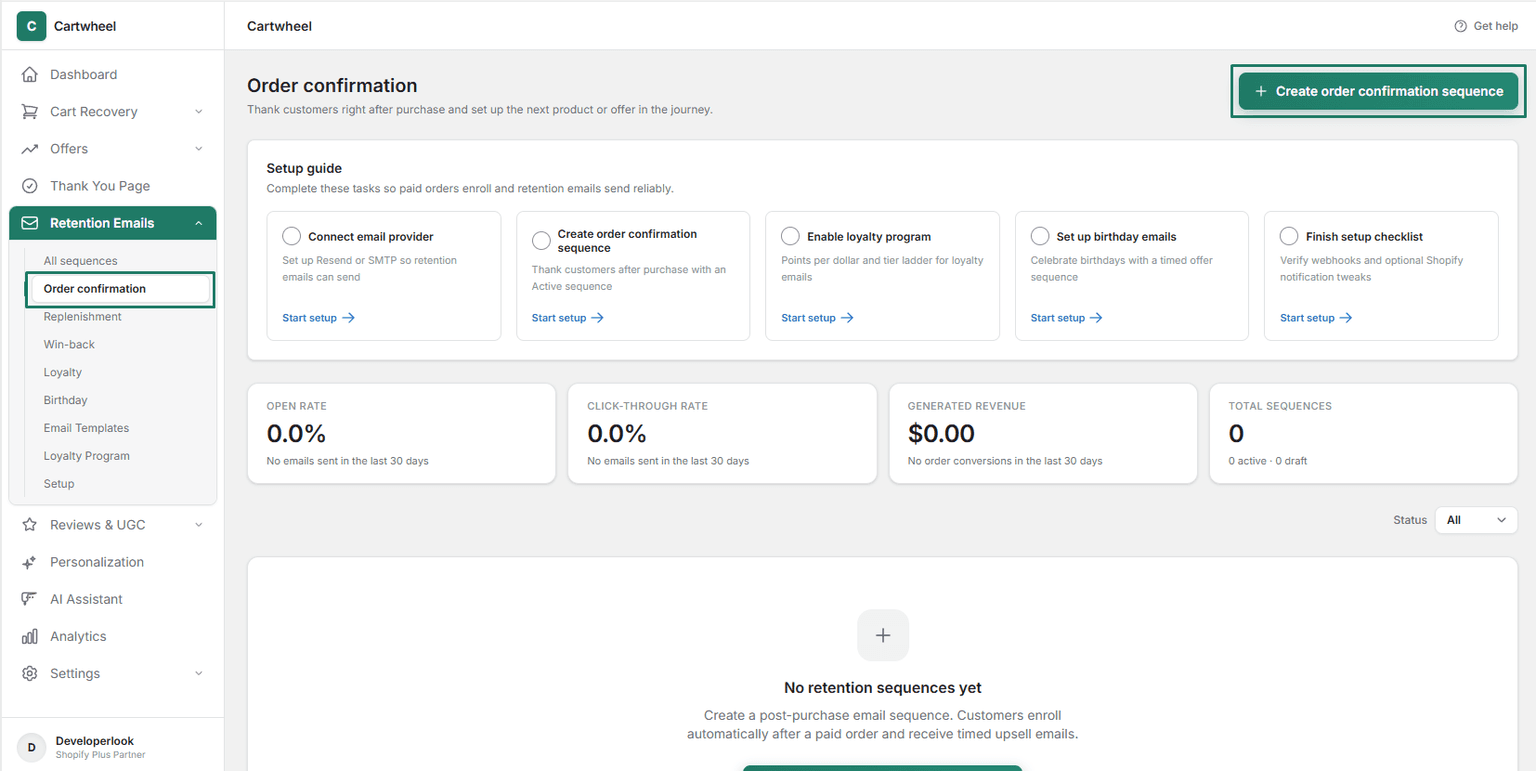
Step 1: Configure Sequence Settings
In the Sequence settings card:
- Sequence Type: Displays
Order confirmation(fixed system type). - Name: Enter a descriptive internal name for your sequence (e.g., Warm upsell — related products or Storewide Order Confirmation Receipt).
- Status: Select the operational state using the status pills:
- Draft: Keep selected while setting up or testing.
- Active: Click to activate automated email dispatch for all incoming paid orders.
- Paused: Temporarily suspend sending without losing existing enrollments.
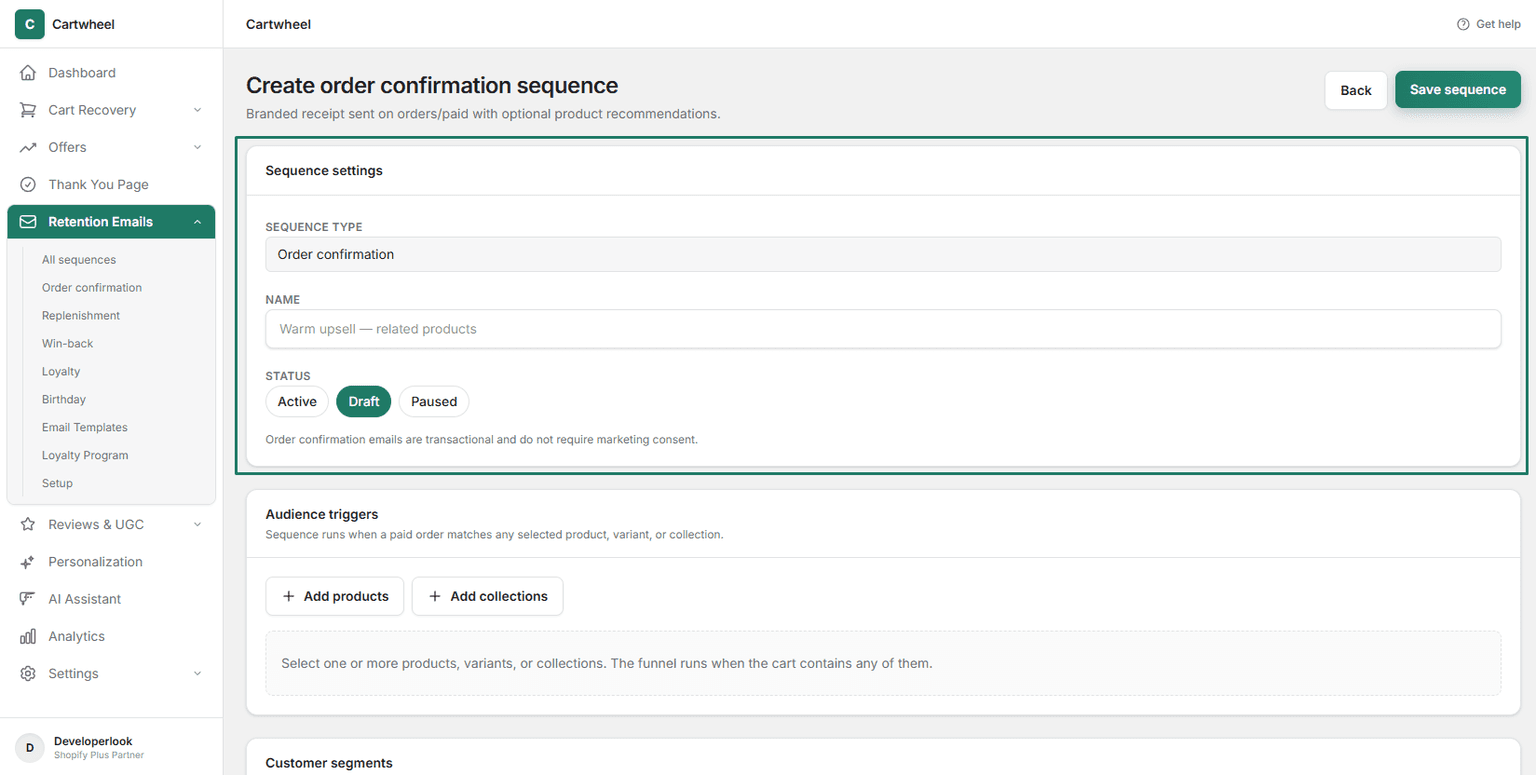
Step 2: Set Audience Triggers (Product & Collection Filters)
By default, the sequence runs for all store purchases. To restrict the confirmation workflow to specific catalog items:
- In the Audience triggers card, click:
- + Add products: Select specific products or individual variants from your store catalog.
- + Add collections: Select entire product collections (e.g. Skincare, Apparel, Accessories).
- Evaluation Logic: The sequence triggers when a customer's paid order contains any of the selected products, variants, or collections.
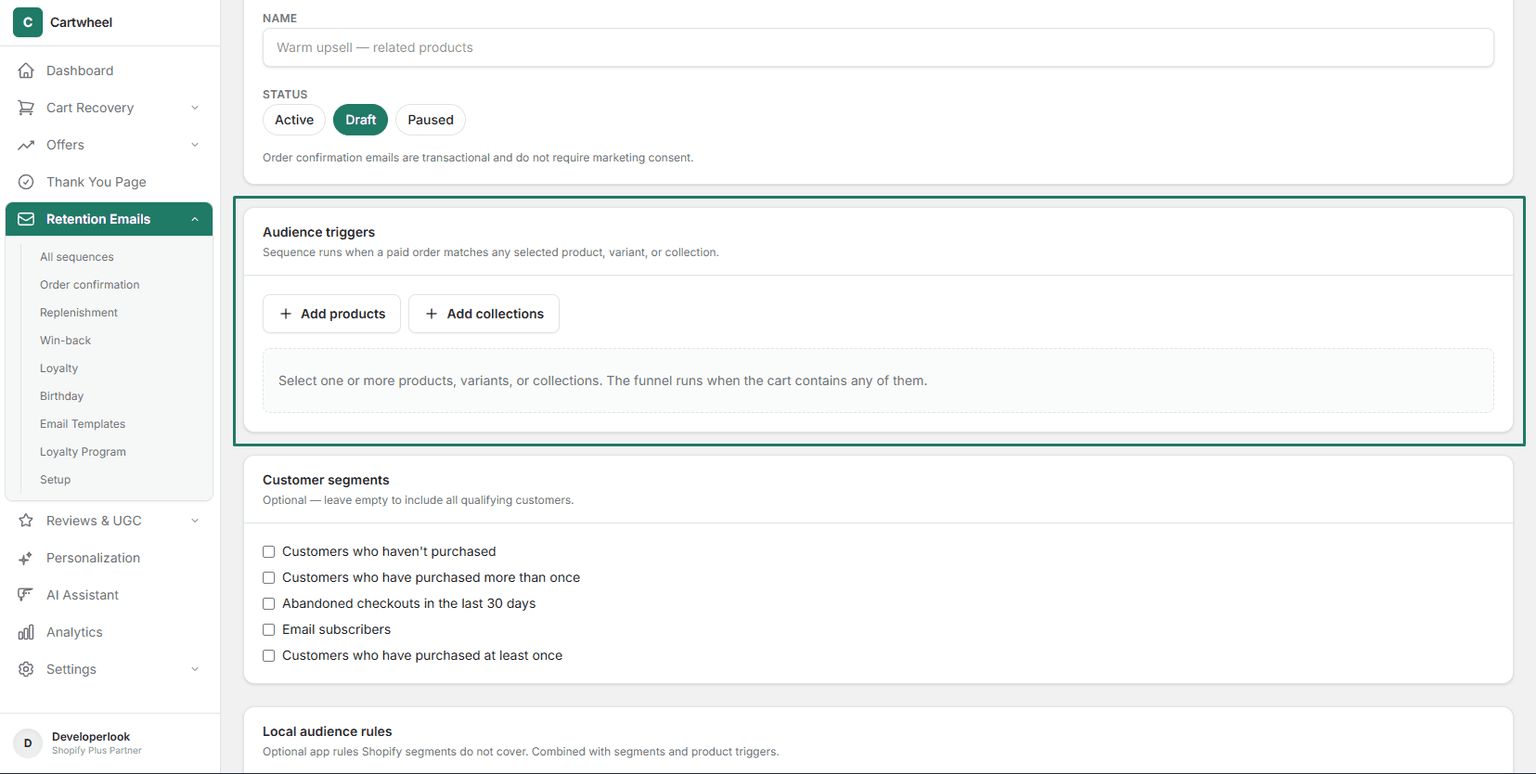
Step 3: Filter by Customer Segments (Optional)
In the Customer segments card:
- View the list of customer segments synced directly from your Shopify store (e.g., Customers who haven't purchased, Abandoned checkouts in the last 30 days, Email subscribers, Customers who have purchased more than once).
- Check the box next to any segment to restrict this sequence exclusively to matching customers.
- Leave all boxes unchecked to include all qualifying shoppers.
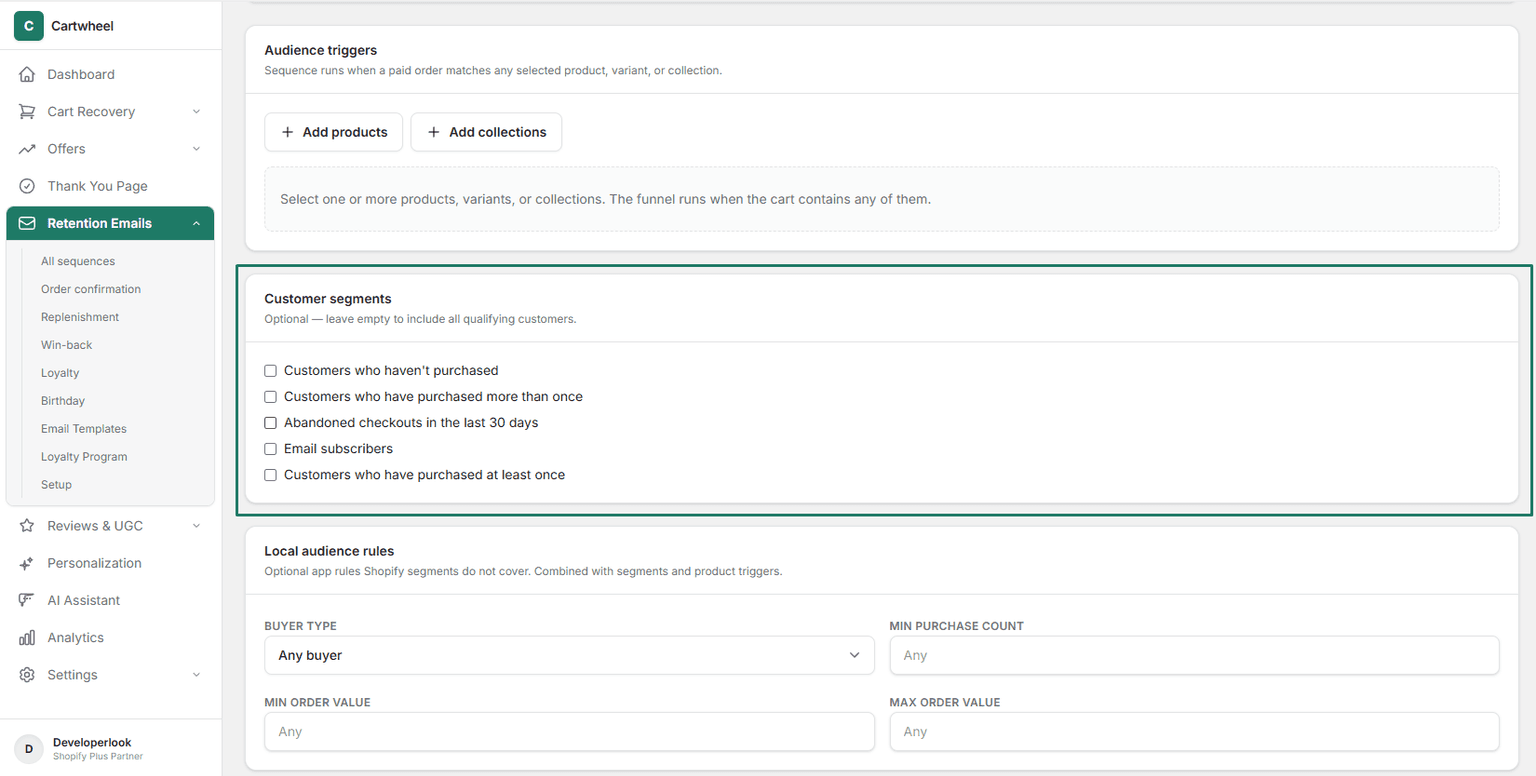
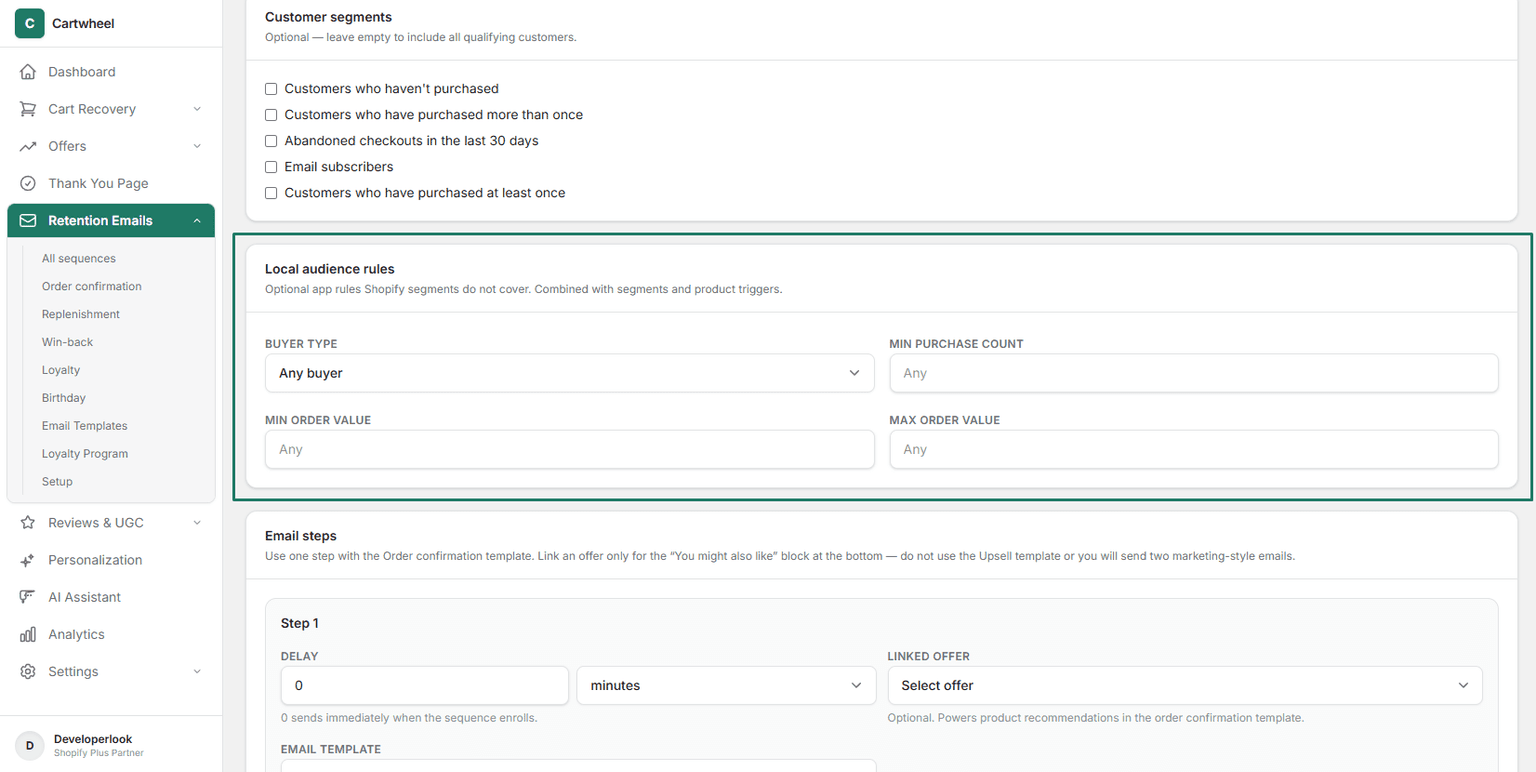
Step 4: Define Local Audience Rules (Optional)
In the Local audience rules card, set fine-grained targeting rules:
- Buyer Type: Select from the dropdown:
- Any buyer: Applies to both new and repeat customers.
- First-time buyer: Triggers only for shoppers placing their first order on your store.
- Returning buyer: Triggers only for customers with 1 or more previous orders.
- Min Purchase Count: Enter a minimum order threshold (e.g.,
3for VIP customer flows, or leave asAny). - Min Order Value: Enter a minimum cart subtotal dollar threshold (e.g.,
$50). - Max Order Value: Enter an optional maximum cart subtotal cap (e.g.,
$250).
Step 5: Configure Email Steps & Linked Offers
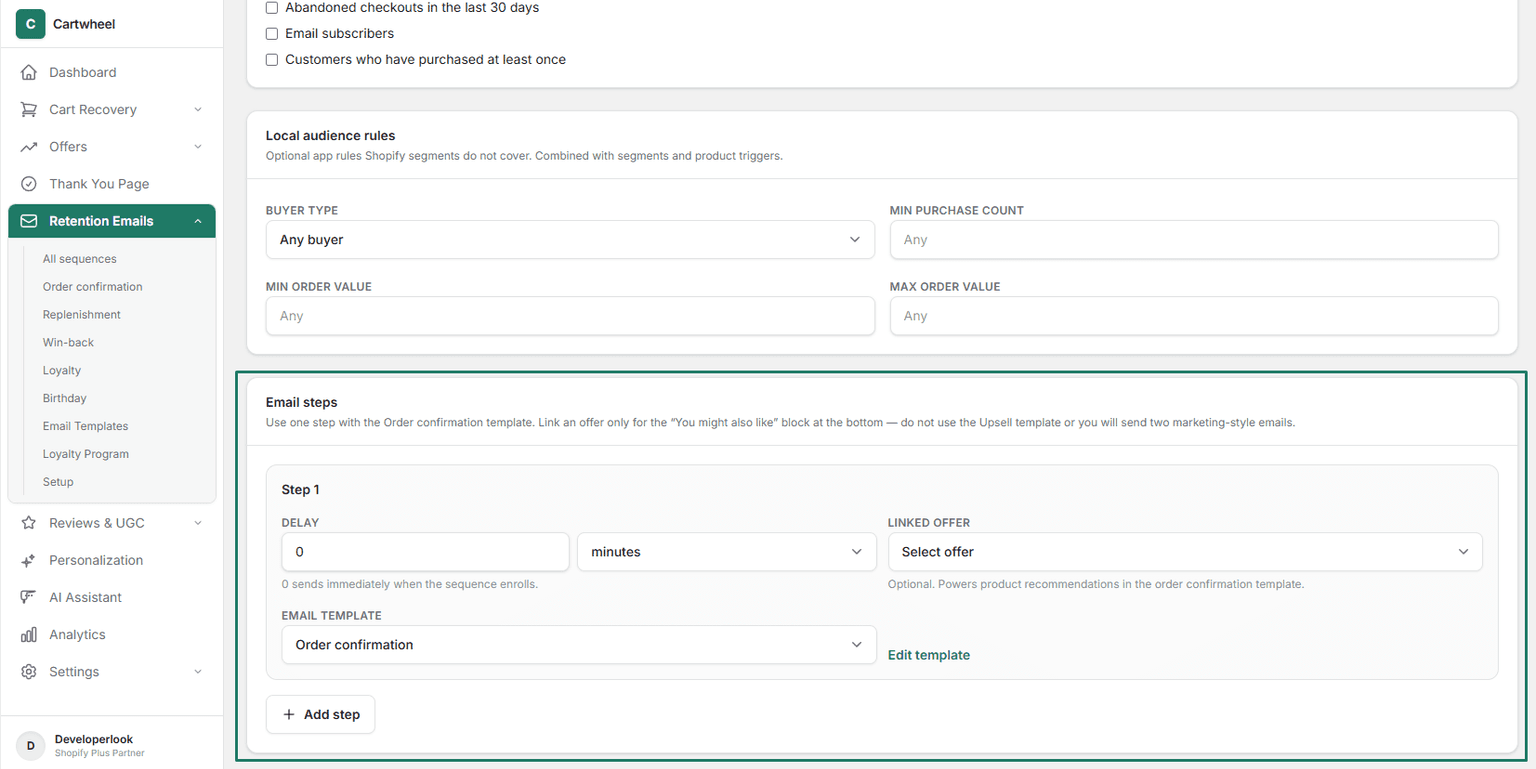
In the Email steps card:
- Delay Duration & Unit:
- In the delay input, enter
0. - In the unit dropdown, select
minutes(e.g.,0 minutessends immediately when the sequence enrolls upon order payment).
- In the delay input, enter
- Linked Offer (Product Recommendations):
- Click the Linked offer dropdown and select an active offer (e.g. Hydrating Serum Upsell).
- Note: Linking an offer powers the dynamic "You might also like" recommendation block inside the order confirmation email template.
- Email Template:
- Select Order confirmation from the template selector dropdown.
- To customize the MJML design, logo header, colors, or copy, see the Email Template Builder Guide.
Step 6: Save and Publish
- Review all configured cards.
- In the Sequence settings card, set Status to Active.
- In the top right action header, click Save sequence to publish the workflow.
Coexisting with Native Shopify Order Confirmation Emails
Shopify automatically sends a basic order receipt upon checkout. You can manage how Cartwheel works alongside Shopify's default emails:
Option A: Complement Shopify Emails (Recommended)
Keep Shopify's standard order receipt enabled for basic transactional proof, and use Cartwheel's sequence as a branded follow-up containing dynamic product recommendations and re-order links.
Option B: Replace Shopify's Email Body
- In Shopify Admin, go to Settings → Notifications → Customer notifications → Order confirmation.
- Click Edit code.
- Replace the body text with a concise notice:
<p> Thank you for your order! Your full itemized receipt and tracking details are on their way from our store. </p> - Cartwheel will then deliver the primary branded order confirmation experience with recommendations.
Testing Your Order Confirmation Sequence
To test and verify your order confirmation sequence:
- Verify Email Provider: Go to Settings → Email Provider (see Email Provider Setup & Diagnostics Guide), ensure your Resend or SMTP gateway is saved, and enter your email address to send a test message.
- Activate the Sequence: In Retention Emails → Order confirmation, ensure your sequence status is set to Active and click Save sequence.
- Place a Test Order: In your Shopify store checkout, place a test order (using Shopify Payments test mode or Bogus Gateway) using a customer email address you own.
- Verify Delivery: Check your inbox to confirm the branded order confirmation receipt arrives with item summaries, dynamic recommendations, and order tracking links.
Related Guides
- Retention Sequences Overview — managing all lifecycle email flows
- Email Provider Setup & Diagnostics — connecting Resend, SMTP, and webhooks
- Email Template Builder Guide — customizing MJML receipt templates
- Smart Personalization Guide — segmenting buyer-type sequences