
Smart Customer Personalization Guide
Attach email sequences and conversion funnels directly to live Shopify customer segments to personalize post-purchase offers, cart recovery, and automated retention campaigns.
Overview: Customer Personalization Workspace
Navigate to Cartwheel Admin → Personalization (/app/personalization).
Shopify natively owns customer segment definitions. Cartwheel connects your live Shopify customer cohorts to automated retention sequences, cart recovery flows, and post-purchase funnels, ensuring every shopper receives relevant messages and tailored upsell offers.
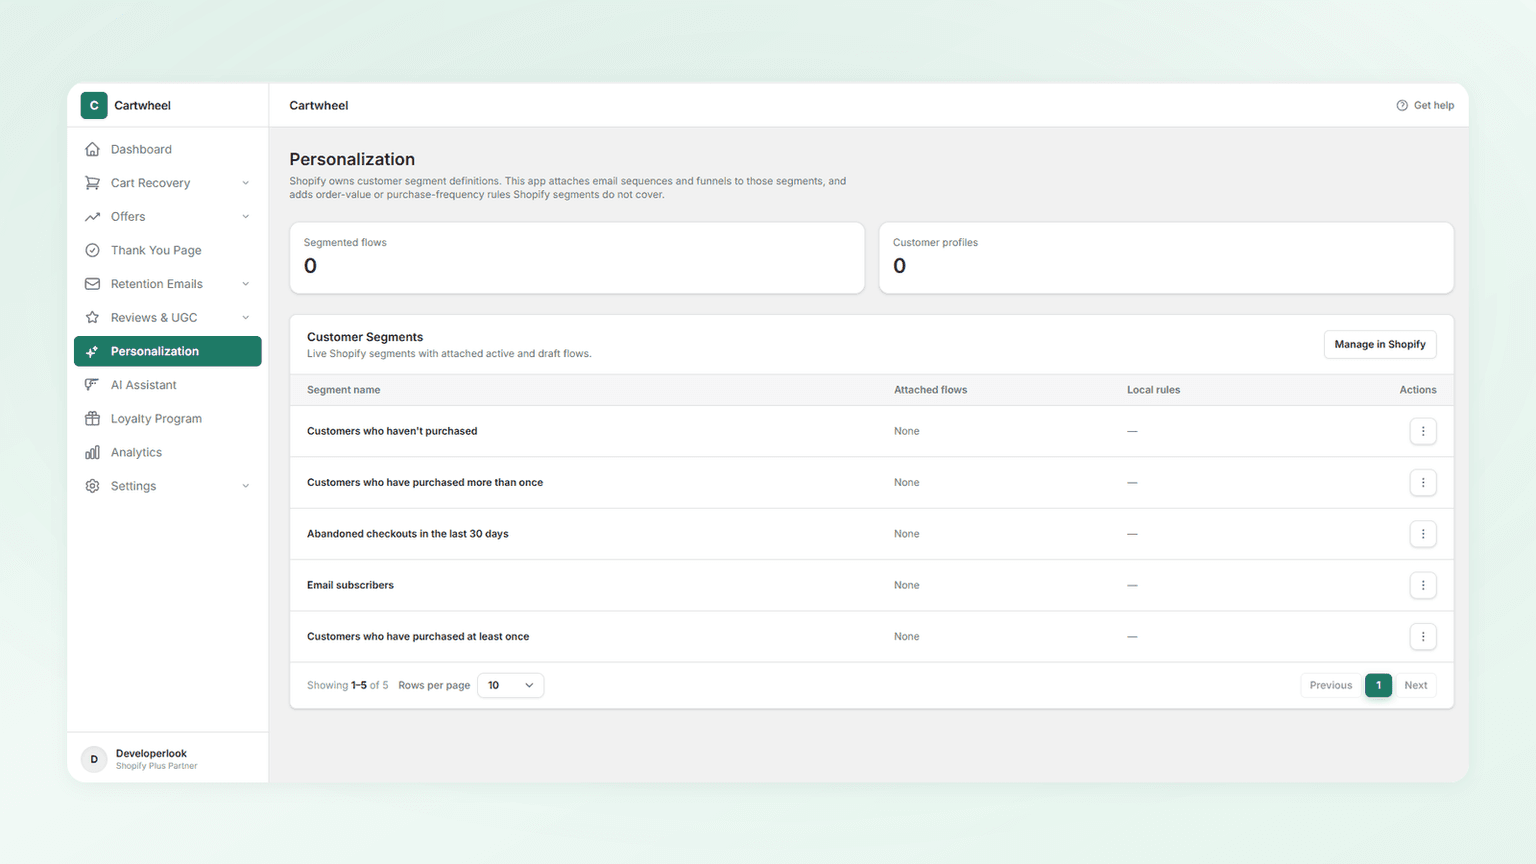
1. Personalization Overview Metrics
The top metrics cards summarize your store's personalization footprint:
- Segmented flows: Total number of email sequences and conversion funnels actively attached to one or more Shopify customer segments.
- Customer profiles: Total shoppers with tracked purchase histories, contact records, and profile data indexed in Cartwheel.
2. Managing Customer Segments & Attached Flows
The Customer Segments table lists all cohorts synchronized live from your Shopify store:
| Table Column | Description |
|---|---|
| Segment name | The name of the customer segment as defined in Shopify (e.g. Customers who haven't purchased, Abandoned checkouts in the last 30 days, Email subscribers). |
| Attached flows | Active and draft email sequences or offer funnels linked to this segment. Displays flow names and status pills (e.g. (DRAFT)). |
| Local rules | Displays audience rule indicators attached to the flow (shows — when none apply). |
| Actions | Context menu (three-dots icon) for attaching flows or modifying existing links. |
Available Actions Menu Options
Click the three-dots icon (···) on any customer segment row to open the quick actions popup:
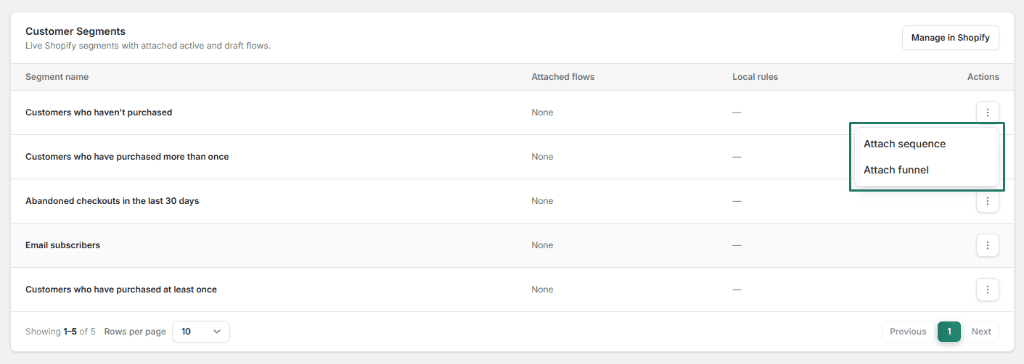
- Attach sequence: Opens the Retention Sequence Builder with this segment pre-selected in the audience trigger rules.
- Attach funnel: Opens the Conversion Funnel Builder with this segment pre-selected in the target funnel settings.
- Edit [Flow Name]: If a sequence or funnel is already attached, direct shortcut links appear in this menu to jump straight into editing that flow.
Creating & Managing Segments in Shopify Admin
Because Shopify natively manages customer definitions, all new cohorts are created in Shopify Admin and automatically synchronized to Cartwheel:
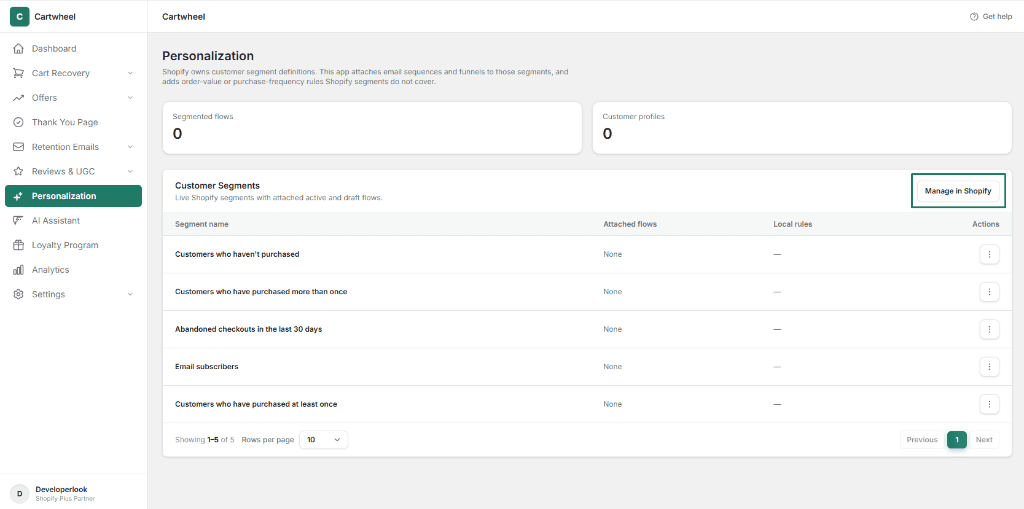
Step 1: Open Shopify Segments from Cartwheel
In the top right header of the Customer Segments card, click Manage in Shopify:
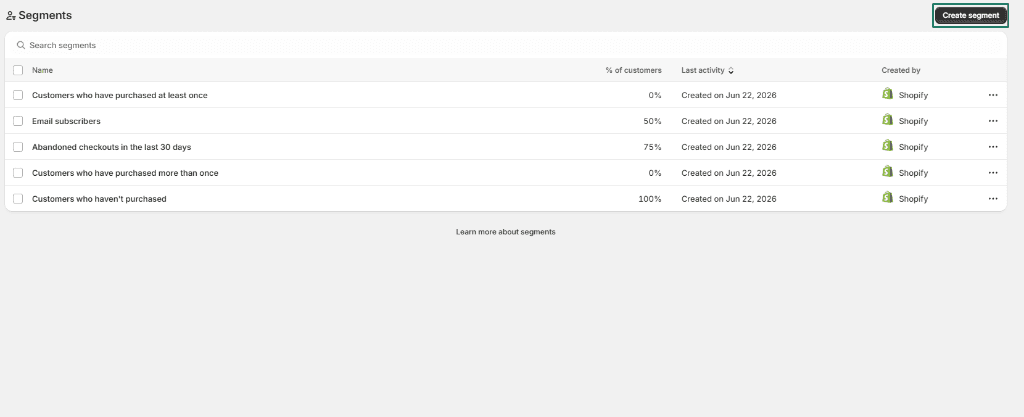
Step 2: Click Create Segment in Shopify Admin
Shopify Admin opens the Customers → Segments dashboard in a new tab. In the top right header, click Create segment:
Step 3: Define Filter Criteria in the Query Builder
In the New segment editor:
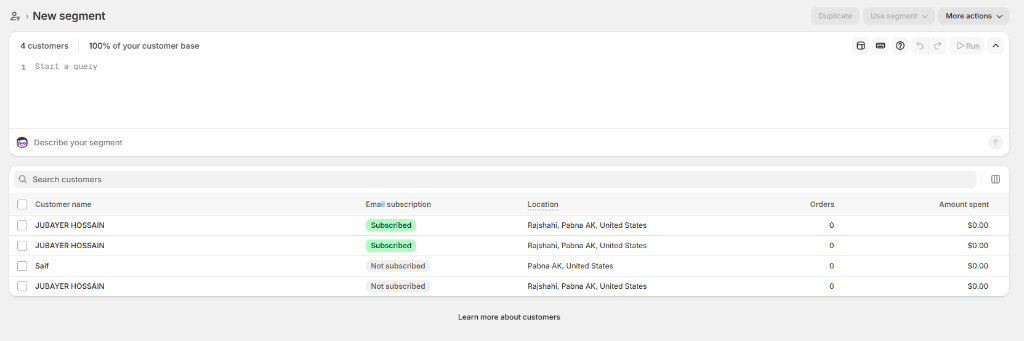
- Query Builder: Enter filter criteria using Shopify's query language or use the natural language prompt box ("Describe your segment"). Examples:
email_subscription_status = 'SUBSCRIBED'number_of_orders > 1customer_tags CONTAINS 'VIP'
- Preview Customers: Click Apply to preview matching customers in the live results table below.
- Save Segment: Click Save segment, enter a recognizable name (e.g. VIP Repeat Buyers or Active Subscribers), and click Save.
Step 4: Access Your Synced Segment in Cartwheel
Switch back to Cartwheel Admin → Personalization. Your new segment is immediately listed in the Customer Segments table. Click the three-dots menu (···) on the new row and select Attach sequence or Attach funnel to start automating personalized shopping journeys!
Step-by-Step: Attaching a Flow to a Customer Segment
Follow these steps to link an automated flow to a specific customer cohort:
- In Cartwheel Admin → Personalization, find your target segment in the Customer Segments table (e.g. Customers who have purchased more than once).
- Click the three-dots Actions menu on the right and select Attach sequence or Attach funnel.
- In the flow builder:
- Configure your offer triggers, email steps, or upsell recommendations.
- Under Audience & Targeting, verify that the selected segment is active.
- Set the flow status to Active and click Save.
- Return to Personalization; the flow immediately appears in the Attached flows column for that segment.
Related Guides
- Conversion Funnels Guide — configuring segment-targeted multi-step post-purchase funnels
- Retention Sequences Overview — building lifecycle and winback email flows
- Cart Recovery Guide — recovering abandoned checkouts with segmented follow-ups
- Analytics Dashboard Guide — tracking revenue attribution and flow conversion rates