
Win-Back Email Sequences Guide
Automatically re-engage lapsed customers who haven't made a purchase in 30, 60, 90, or 120 days with timed promotional reminders and compelling comeback incentives.
Overview: How Win-Back Sequences Work
Customer churn directly impacts merchant profitability. Cartwheel's Win-Back Sequences continuously evaluate customer order histories. When the time elapsed since a customer's last purchase reaches your configured Inactivity window (days) threshold, Cartwheel automatically enrolls the customer into a timed follow-up campaign.
Multi-Touch Win-Back Strategy
In Cartwheel, you can structure win-back campaigns using multi-step timelines within a single sequence, or by creating separate tiered sequences for different inactivity milestones:
1. Multi-Step Timeline Within a Sequence
Once a customer reaches your inactivity threshold (e.g. 60 days), Cartwheel can dispatch a structured series of follow-ups:
- Step 1 (0 Days Delay — Day 60): A warm check-in email showcasing new arrivals, seasonal collections, and bestsellers.
- Step 2 (7 Days Delay — Day 67): A follow-up email featuring a linked Cartwheel offer with a compelling discount rate.
- Step 3 (14 Days Delay — Day 74): A final reminder emphasizing urgency before customer communication pauses.
2. Tiered Inactivity Sequences
Alternatively, you can create separate win-back sequences targeting different customer lifecycle stages:
- 30-Day Sequence: Early re-engagement for fast-moving retail items.
- 60-Day Sequence: Standard win-back workflow for seasonal shoppers.
- 90–120 Day Sequence: High-urgency campaign targeting long-lapsed customers.
Creating a Win-Back Sequence
To create and configure a win-back sequence:
- In your Shopify Admin, navigate to Apps → Cartwheel → Retention Emails.
- Click the Win-back tab in the sub-navigation.
- In the top right action header, click Create sequence.
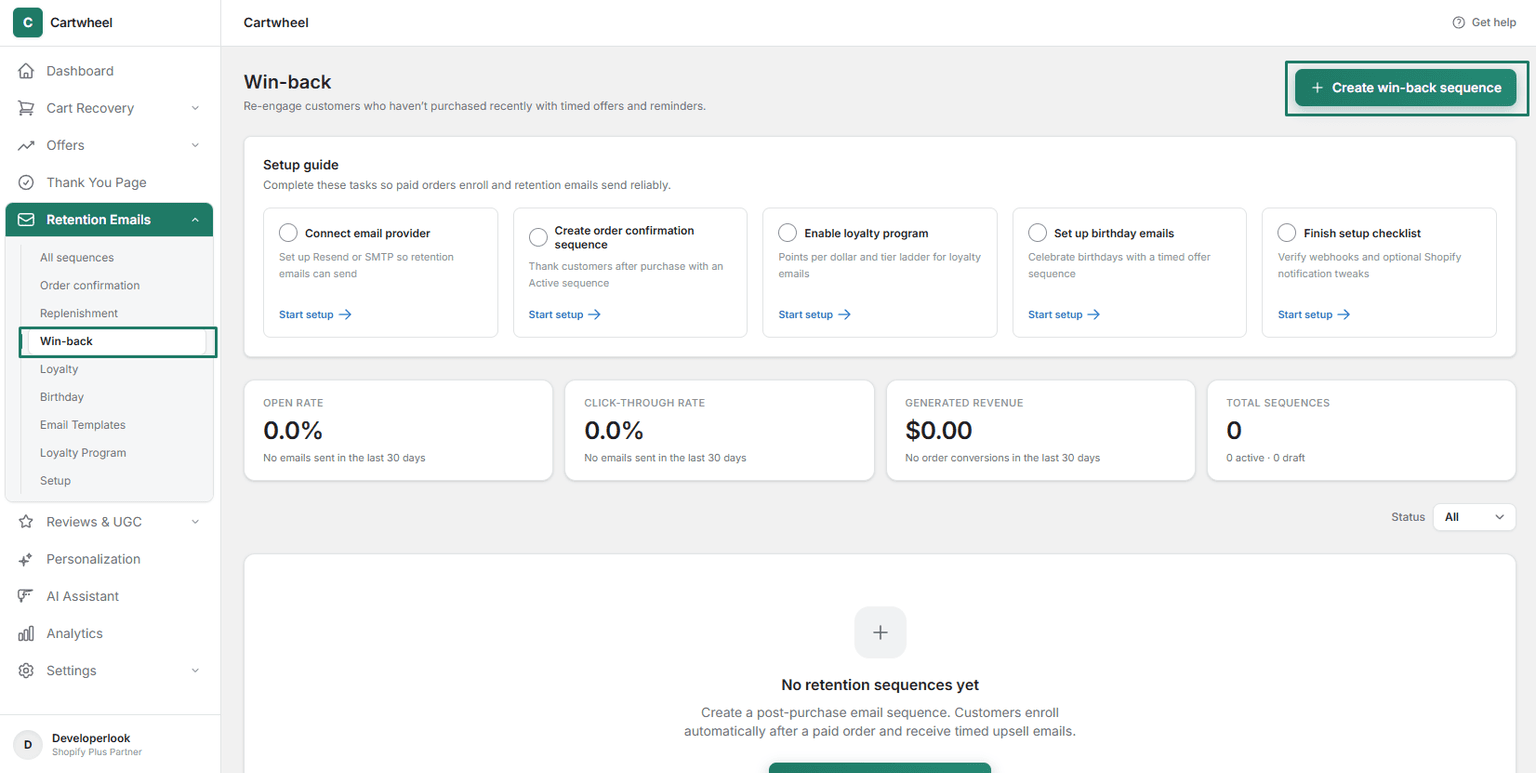
Step 1: Configure Sequence Settings
In the Sequence settings card:
- Sequence Type: Displays
Win-back(fixed system type). - Name: Enter an internal reference name (e.g., Win-back — 60 days or Lapsed VIP Customer Re-engagement).
- Inactivity window (days): Enter the number of days since the customer's last order before enrollment triggers (e.g., enter
60or90days for production, or0for fast testing). - Status: Select operational status:
- Draft: Keep selected while editing templates and offers.
- Active: Cartwheel's background scheduler scans daily and enrolls matching lapsed customers.
- Paused: Temporarily suspends sending without losing current enrollments.
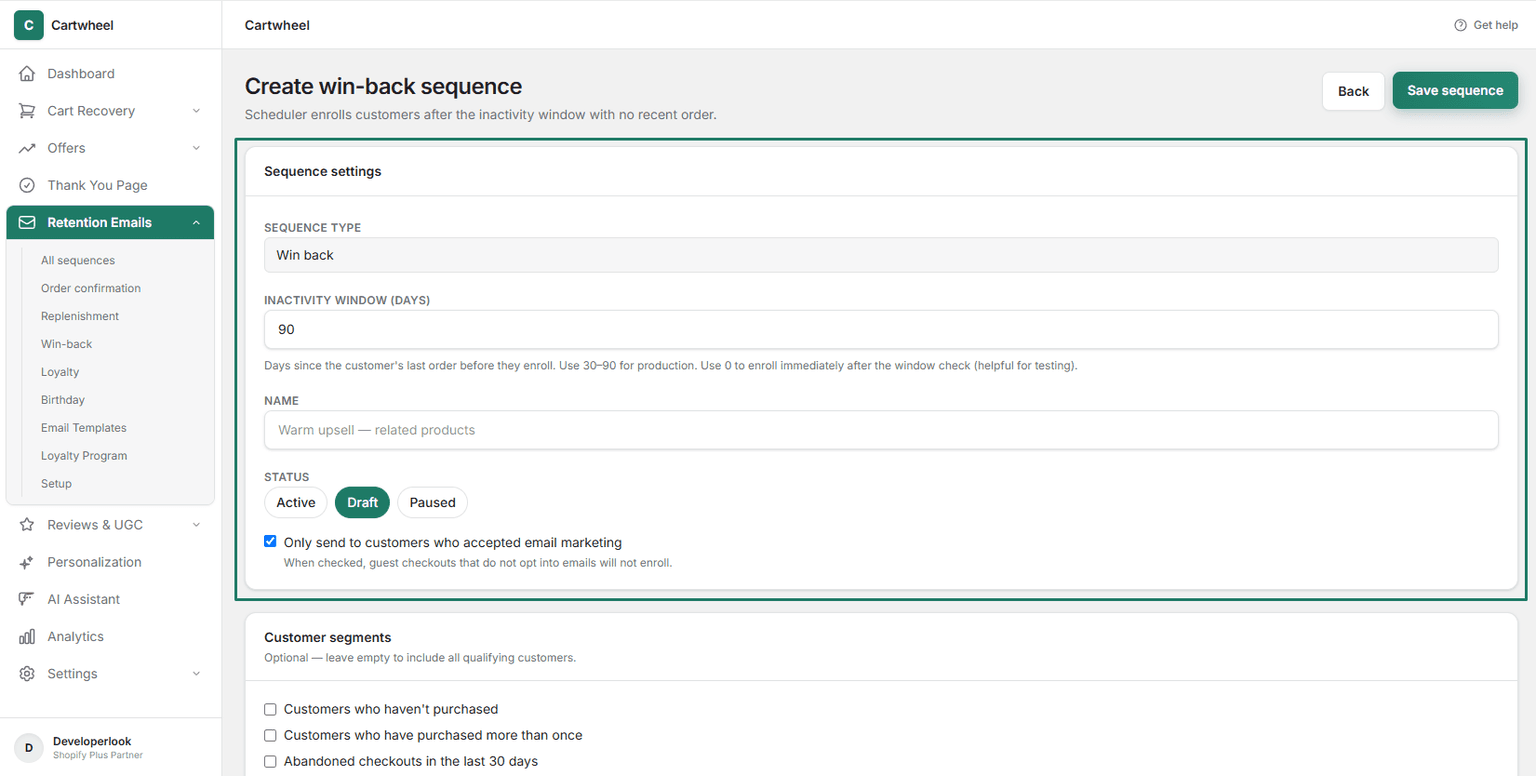
Step 2: Set Audience Triggers (Optional)
In the Audience triggers card:
- Click + Add products or + Add collections to restrict this win-back workflow to shoppers who previously purchased specific items.
- Leave empty to include all customers across your entire store catalog.
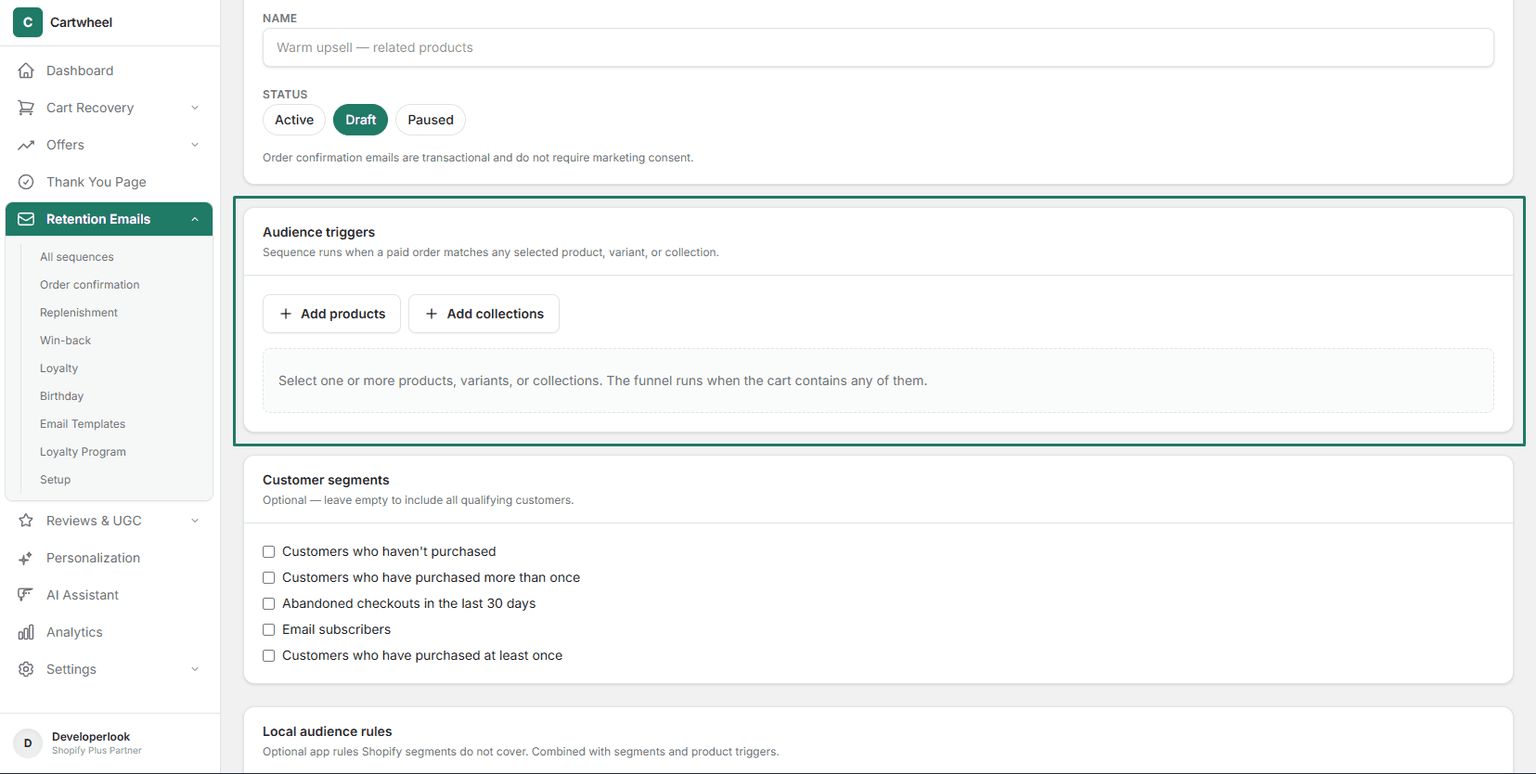
Step 3: Filter by Customer Segments (Optional)
In the Customer segments card:
- Select from synced Shopify customer segments (e.g. Customers who have purchased more than once or High AOV Customers).
- Check the box to target a specific cohort, or leave blank to evaluate all qualifying store shoppers.
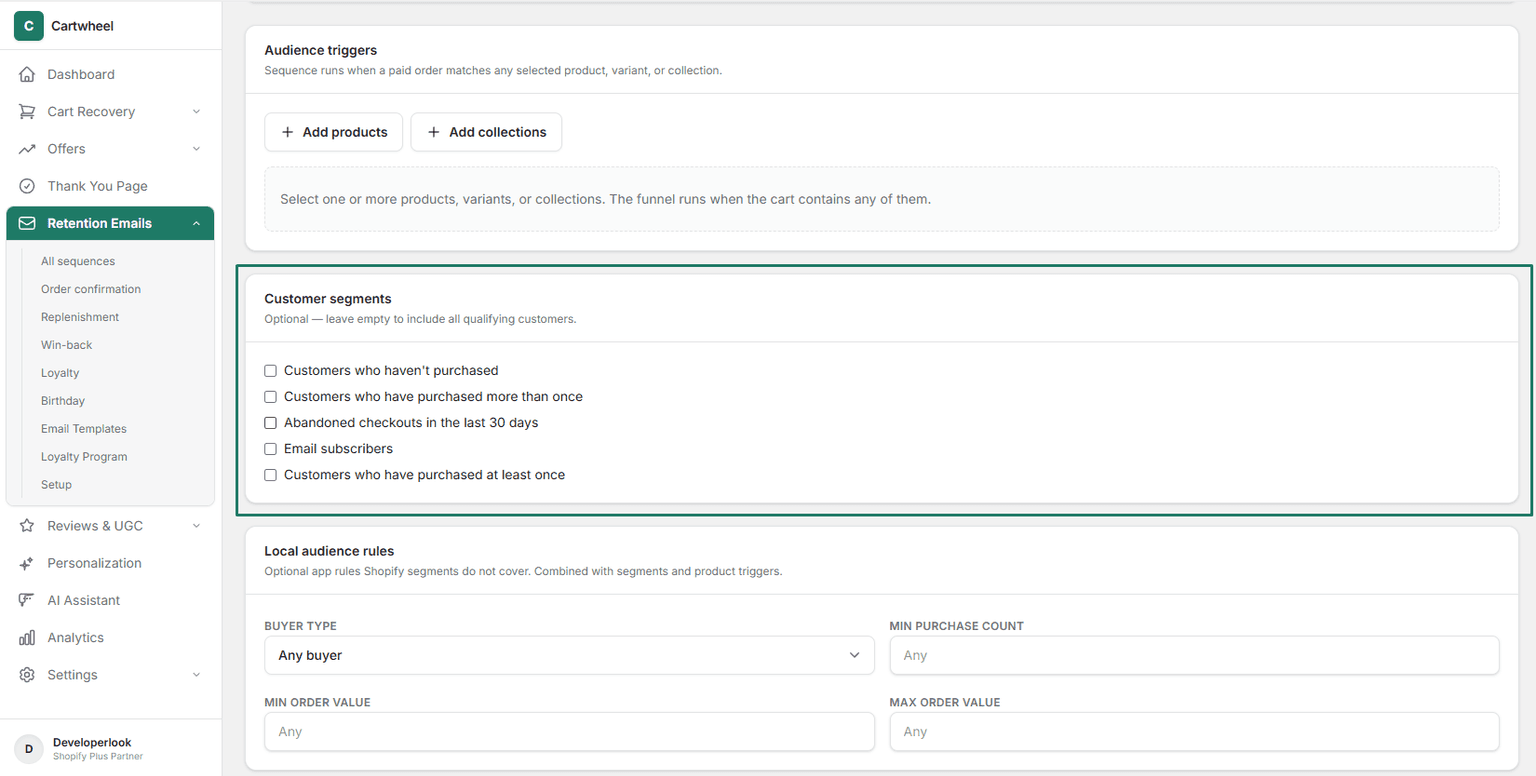
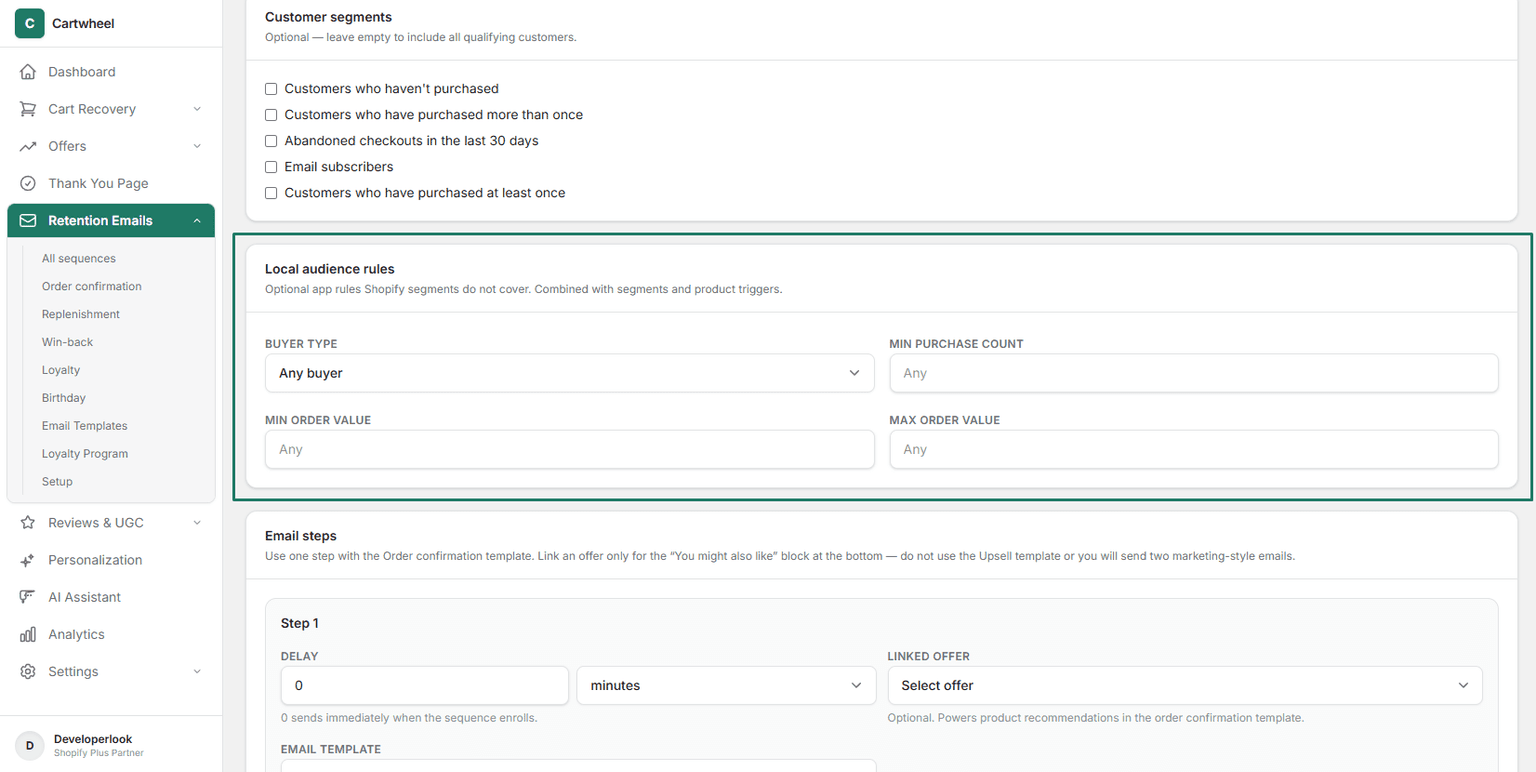
Step 4: Define Local Audience Rules (Optional)
In the Local audience rules card:
- Buyer Type: Select Returning buyer (recommended for win-back campaigns).
- Min Purchase Count: Enter
1or higher to target verified past buyers. - Min Order Value: Optionally set a minimum past spend threshold (e.g.
$75+) to prioritize high-value customers.
Step 5: Configure Email Steps & Linked Offers
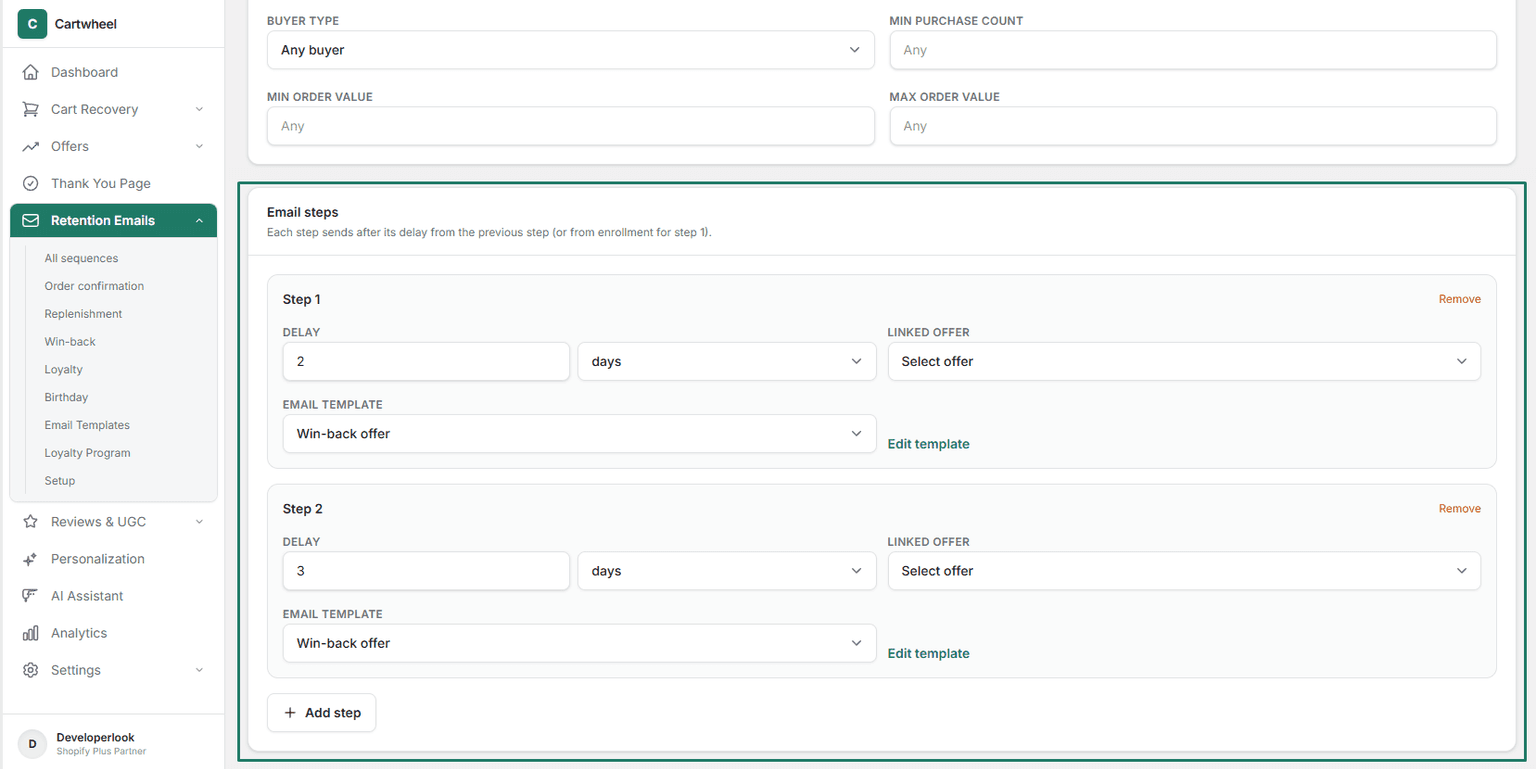
In the Email steps card:
- Step 1 (First Re-Engagement Email):
- Delay: Set numeric value to
0and unit todays(sends immediately upon reaching the inactivity window). - Linked Offer: (Optional) Select an active Cartwheel Offer to display dynamic product recommendations.
- Email Template: Select the Win-back email template.
- Delay: Set numeric value to
- Step 2 (Follow-Up Reminder — Optional):
- Click + Add step.
- Delay: Set to
7 days. - Linked Offer: Select your promotional offer.
- Email Template: Select your follow-up reminder template.
- Step 3 (Final Notice — Optional):
- Click + Add step and configure a
14 daysdelay.
- Click + Add step and configure a
Step 6: Save and Publish
- Review all cards and ensure Status is set to Active.
- In the top right header, click Save sequence to launch automated win-back monitoring.
Related Guides
- Retention Sequences Overview — managing all lifecycle email flows
- Replenishment Sequences Guide — consumable restock reminders
- Loyalty Program & Tiers — win-back campaigns with bonus loyalty points
- Email Template Builder — customizing MJML win-back templates
- Email Provider Setup & Diagnostics — mail provider settings and webhook status